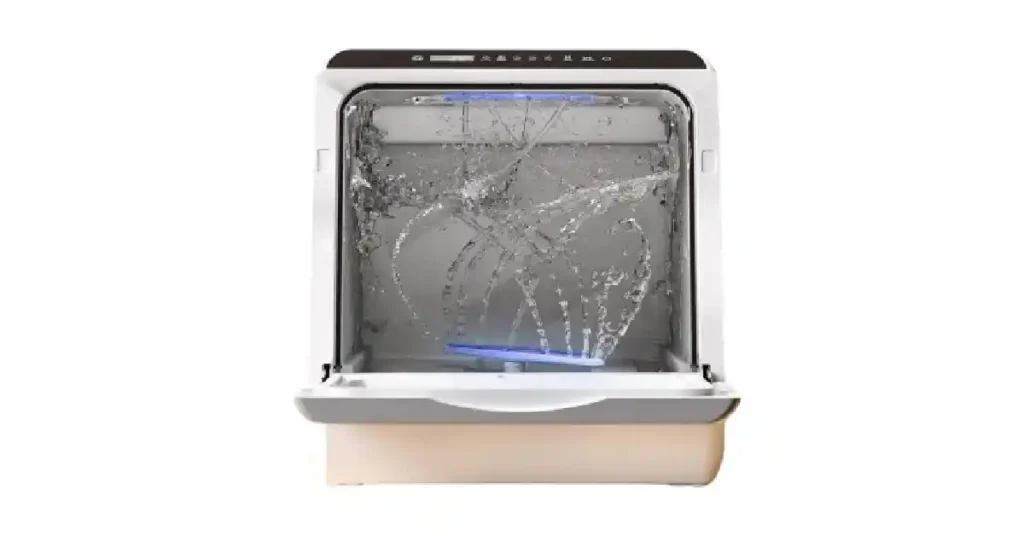
Very often, clever solutions are required for everyday life, and a portable dishwasher is a typical example. These small yet powerful machines can make a difference for anybody who wants a clean kitchen but doesn’t want to wash dishes by hand. Here we cover How to use a Portable Dishwasher.
Known as an excellent choice for small kitchens; they offer efficiency in a compact size which makes them perfect for kitchens with limited space matter; whether you live in a cozy apartment, travel much on an RV, or simply need assistance during holiday meals.
No worries; I’m here for you! In this guide, I’ll give you some simple tips and tricks for How to use Dishwasher so that it stays clean and hygienic for you and your family.
ALSO READ: 10 Common Dishwasher Mistake You Should Avoid.
How to Use a Portable Dishwasher Step-by-Step Guide.
#1. Choose a Suitable Location
- Find a flat, level surface: For instance, stability is critical when setting up your portable dishwasher. During operation, it is safer if the appliance does not fall which means it should be placed on a flat level surface ensuring safety and effective performance.
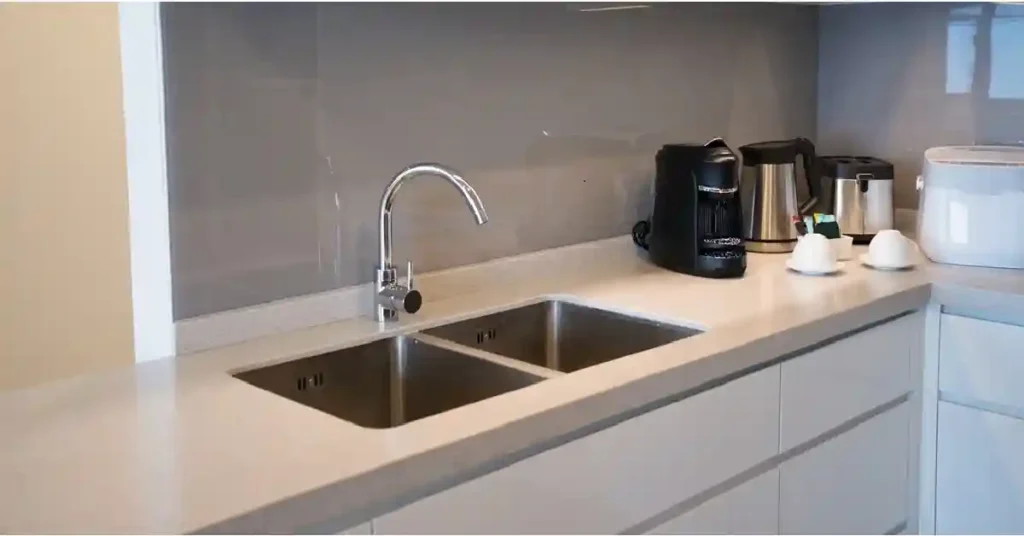
- Proximity to a water source: It is better if one keeps his/her portable dishwasher near the kitchen sink for the ease of connection provided in this arrangement. This arrangement enables easy connection of the water supply and drainage system, which are very vital to its operation.
- Access to an electrical outlet: A portable dishwasher is being powered. Make sure that there is an available standard electrical outlet near where the cord reaches.
- Space considerations: You should remember that although portable dishwashers are made small, you should allocate enough space for full opening of the door to allow easy loading and unloading of dishes.
Tip: “Before you buy or move your portable dishwasher, determine its precise location by taking measurements. Ensure that both dimensions i.e., height, width, depth of appliance as well as space are considered before completing a purchase decision to ensure perfect fitting. This will go a long way into making sure you do not waste resources unnecessarily as well as maximize how efficiently your dishwasher can be done with proper measurements made on it.”.
#2. Inspect the Dishwasher
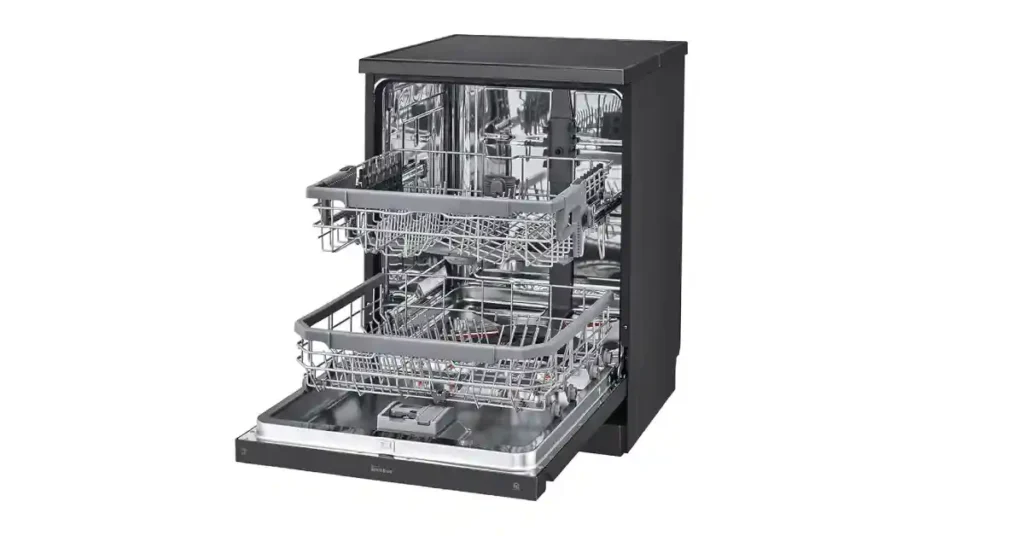
- Unpack with care: After you have found and selected an ideal spot for your portable dishwasher, unpack it cautiously. Therefore remove all packing materials carefully so as not to cause damage to them like these in particular instances leading to spoiling their quality.
- Visual inspection: Ensure after unpacking; you conduct a thorough visual inspection of your new Portable Dishwasher looking out for any signs of damage such as scratches, dents, or broken parts occurring during the transportation process.
- Check the components: The user’s manual that accompanies the dishwasher should be referred to. It ought to have a list of components included in this appliance. Double-check if nothing is missing by comparing this list with the actual parts you’ve got.
- Look for operational parts: Examine the dish rack, spray arm, and detergent holder for any signs of damage or looseness. All these parts should be secure and remain in good condition throughout the life span of your dishwasher.
- Examine the hose and connectors: Your dishwasher cannot function without a water supply and drainage hoses, together with their connectors. Do they have any traces of wear and tear?
- Ensure electrical safety: The power cord and plug must be safe for operations. Contact the manufacturer or an electrician immediately if you discover worn-out cables or faulty plugs before using them.
Tip: “Until you confirm that the dishwasher is functioning properly, always leave the packaging materials intact. In case you want to send back the product or relocate it, it will come in handy in this situation.“.
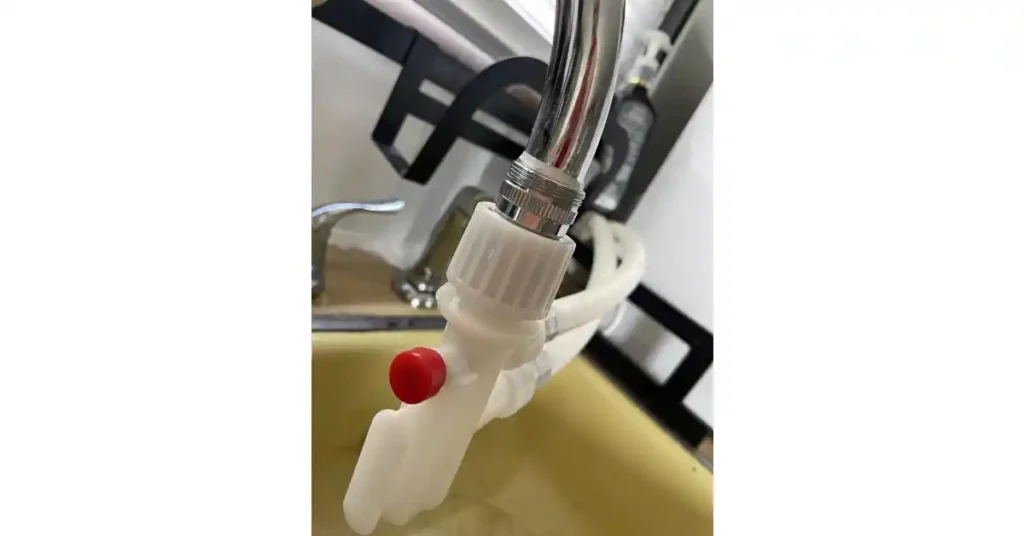
#3. Connect the Faucet Adapter
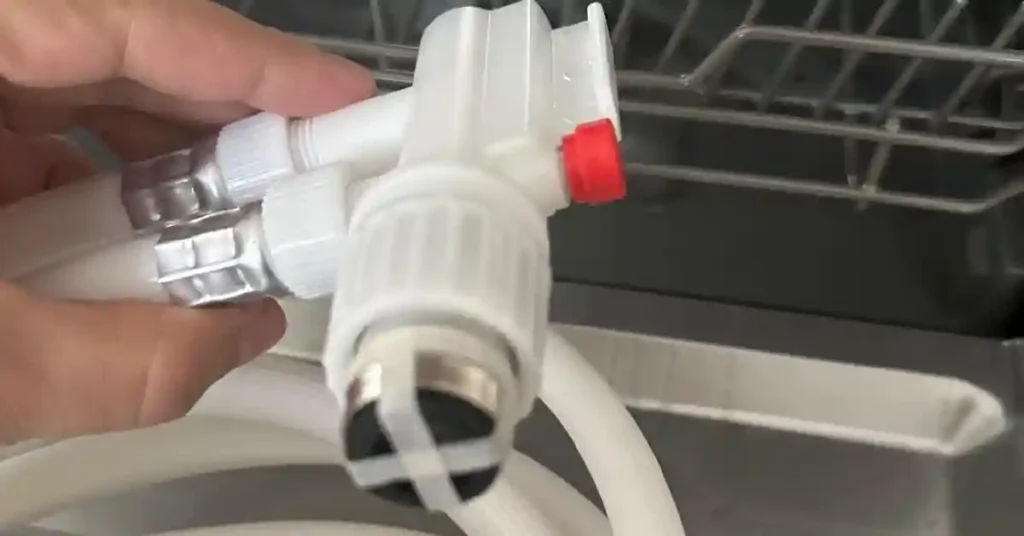
- Identify the faucet adapter: A portable dishwasher always comes with a small, but important faucet adapter. It links the dishwasher’s hoses to the kitchen faucet.
- Ensure compatibility: Before you continue, ensure that the adapter is compatible with your kitchen faucet. Standard adapters included in most portable dishwashers usually fit faucets that have a removable aerator on them.
- Remove the aerator (if necessary): If there is an aerator on your faucet, take it off and keep it somewhere safe because you will swap it for the faucet adapter.
- Attach the faucet adapter: Now, install the faucet adapter onto your kitchen sink carefully. This procedure should be carried out as per the manufacturer’s instructions so as not to go wrong with anything. Screw it in tightly enough to be secure but don’t tighten too much or else threads may be damaged.
- Ensure a secure fit: Examine the connection carefully to ensure the adapter is securely attached. During use of your dishwasher, a loose connection can lead to water leakage.
- Test for leaks: When connecting your dishwasher, consider performing a leak test before doing so. Turn on the tap and check if any water escapes through the area around this device’s attachment position. If leaks are present, just screw up slightly more without applying too much pressure.
Tip: “To attach a faucet adapter, you may keep a small wrench or pair of pliers to hand. Nevertheless, take care not to use them excessively and cautiously so as not to ruin the faucet or the adapter.”
#4. Connect the Water Inlet Hose
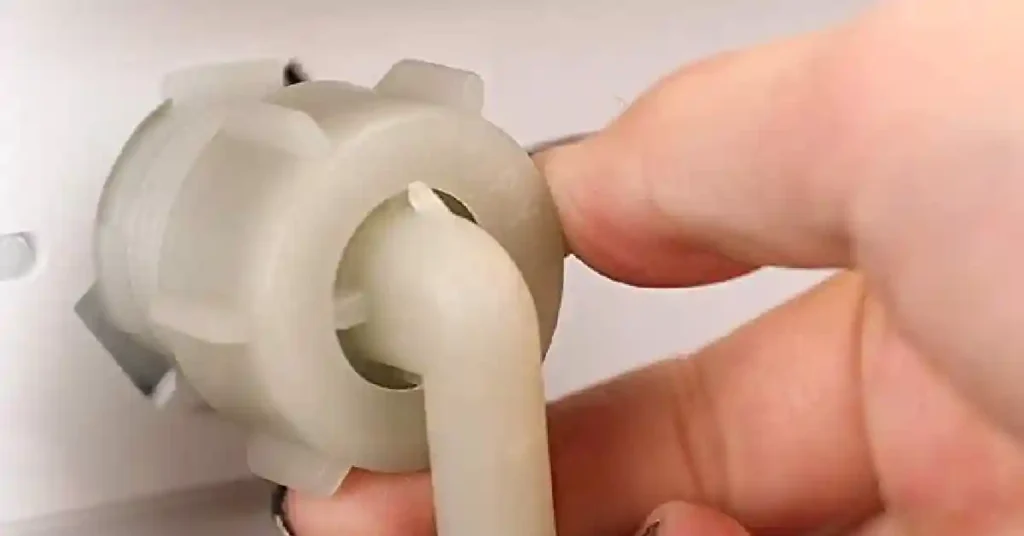
- Identify the water inlet hose: Your portable dishwasher comes with a water inlet hose, usually situated at the back of the machine. This hose is intended for transferring water from the tap into your dishwasher.
- Locate the faucet adapter: The faucet adapter that was already installed onto your kitchen sink in the previous section is where the water inlet hose connects.
- Connect to the faucet adapter: Take one end of the water inlet hose and attach it to the faucet adapter. Ensure that it is well fastened to avoid leakage of any kind.
- Find the water inlet on the dishwasher: At this point locate your portable dishwasher’s water inlet which is normally marked by its manufacturer and specifically placed at its back side.
- Connect to the dishwasher: Now find where your portable dishwasher’s water inlet is. It can be found on its rear side and there should be an indication that it is made by a manufacturer.
- Check for tightness: Finally, attach another end of this plumbing pipe onto another part to enable free flow. Also, make sure that the connection is made tight enough but securely so as not to have any leakages when using this system.
Tip: “Before and after each wash, you should visually check the water inlet hose as well as its connections. This regular act can help identify any probable problem before they get worse: this will save you from water leaks, and prolong your portable dishwasher’s durability.“
#5. Connect the Drain Hose
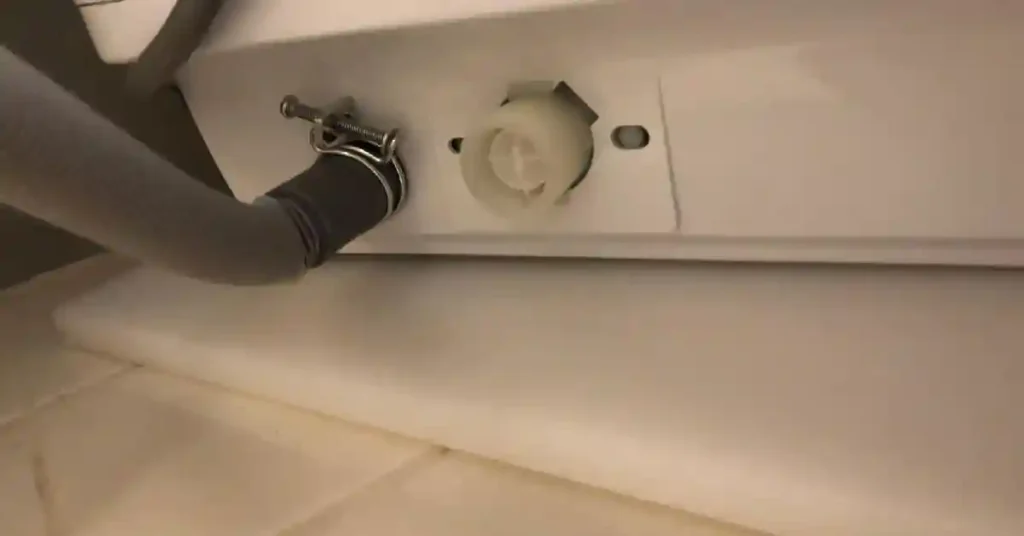
- Locate the drain outlet: The initial step in connecting the drain hose is to locate the drain outlet on your portable dishwasher. Such an outlet would normally be marked by the manufacturer and is situated at the rear of the appliance.
- Attach the drain hose to the dishwasher: Firstly, attach one end of the drain hose to it once you have identified your drainage outlet. You need a secure connection for smooth water outflow.
- Position the drain hose: Then point the other end of the drain hose toward your kitchen sink or another suitable drainage point, where wastewater from it will be released.
- Check the drain point: Before locking up with a clamp, make sure that there are no obstructions on drainage points as well as it can handle flow volumes from the washer. The drain should not be obstructed in any way and allow enough passage of liquid.
- Secure the drain hose: Position the drain hose and fasten it. A hook or holder can achieve this. Securely fastening the drain hose prevents it is slipping while draining.
- Double-check everything: To sum up, cross-check all your fittings. Drainage should be tight at both ends of the drain hose and well-anchored to the drainage point.
Tip: “The drain hose should be checked frequently for signs of wear and tear and blockages. This proactive approach helps decrease possible leaks or drainage problems that would otherwise hinder the proper functioning of your portable dishwasher.“
#6. Plug in the Dishwasher
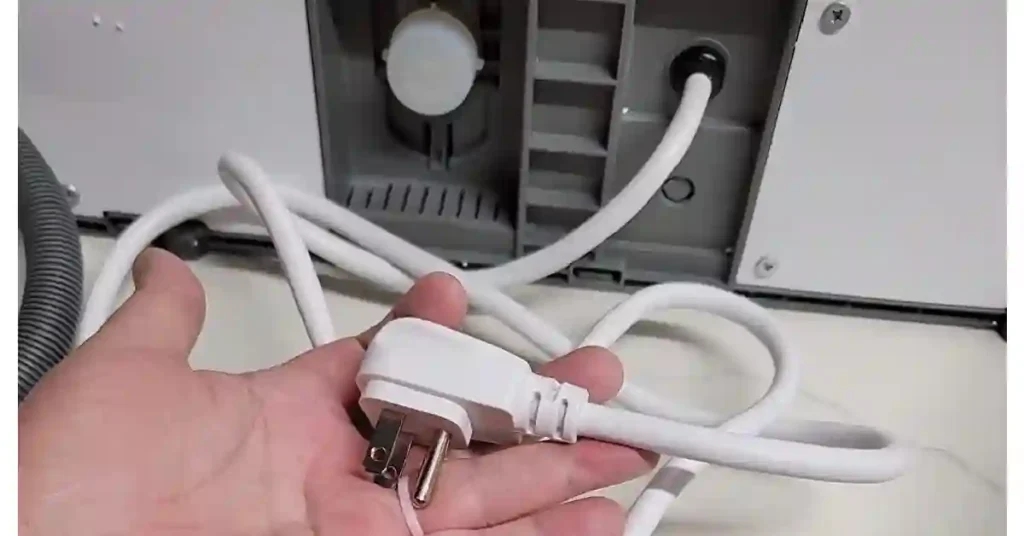
- Identify the power cord: A power cord is found in every portable dishwasher. This is usually located at the back side of the machine where it is neatly kept away from sight. It is used to connect a dishwasher with a power supply.
- Locate a suitable outlet: Find an electrical outlet near your dishwasher which would be situated conveniently there. Also, make sure that you have a power lead that will comfortably reach this position without any strain or stretch as this may cause damage to the cord.
- Check the outlet compatibility: Not all outlets are created equal when it comes to electricity issues so one has to ensure that they select one that matches their dishwasher’s plug type. The pins in the plug should fit perfectly into the outlet.
- Examine the power requirements: Dishwashers have specific power requirements which are usually provided in the user manual or on a label attached to the unit. Make sure that the electrical supply in your home is sufficient for these requirements.
- Plug in the power cord: Now, delicately plug in the cord of the dishwater into an electrical socket. The plug is supposed to fit and stay inside this outlet firmly; this is proof of its stability.
- Ensure the plug is secure: Once you have plugged it in, ensure that the connection is not loose. It should be stable and immovable without shaking as long as your dishwasher is working for an uninterrupted supply of power.
- Arrange the power cord properly: Move the cord so that it does not block any pathway or cause anyone to fall. It should run alongside your dishwasher or be flat against one of its walls.
Tip: “Regularly examine if there are any indications of damage on the cord’s surface. In such cases, it becomes risky and can lead to short-circuiting or even fire when an electric short occurs. As soon as you notice a faulty power cable, replace it with another one to enable smooth running of your machine.“
#7. Check the Water Supply
- Turn on the faucet: Do this by turning on your kitchen tap. This step helps you know whether there is enough water supply available at home. No interruptions should be experienced while fetching water from these sources.
- Monitor the water flow: Watch out for the speed of the water flow. It should run without a break and be consistent. An irregular or weak water flow raises some concerns.
- Verify the water temperature: Check that the dishwasher water is set at the appropriate temperature. The best temperature usually revolves around 120°F (49°C). Dishwasher efficiency gets compromised if it becomes too hot or cold.
- Check for any leaks: Also monitor any leaks around the faucet while the water is on and also check on the hoses. When you see any drip or pool of water, it may signal a loose connection or damaged hose.
- Assess the water pressure: Water pressure should be enough for the proper functioning of a dishwasher. If it is too low, then your dishes may not get cleaned by a dishwasher well enough.
- Examine the water quality: Last but not least, look at the quality of your water. Hard water with high mineral content can result in depositing upon your dishes and inside the dishwasher itself.
- Ensure the water flows into the dishwasher: Finally, ensure that there’s a free flow of tap water into the dishwasher throughout its length to ensure that none of its parts are blocked or bent incorrectly.
Tip: “Regular checks on your supply system will save your dishwasher from possible inconveniences in performance. Remember that an uninterrupted and sufficient supply of clean running water is essential for efficient operation of dishwashers.“
#8. Run a Pre-Check
- Get the dishwasher ready: There should be a check to make sure that the dishwasher is plugged in and connected to the water supply. The drain hose must also be well positioned and the power cord secured.
- Empty the dishwasher: Before doing this pre-check, ensure that the dishwasher is empty. Dishes, cutlery, or anything else should not be inside it.
- Turn on the dishwasher: Now your dishwasher is set to be switched on. A noise will indicate that this machine is working.
- Check the water flow: In any operation of a dishwasher, water first enters it. When you turn on your dishwasher, listen to the sound of water entering it; this will confirm that you have correctly connected and functioning water supply system.
- Monitor for leaks: Keep checking around the appliance for any signs of water leaks as the dishwasher begins its operation. Pay close attention to connections at the water supply as well as drainage points.
- Verify the drain function: After some time, usually a few minutes of running, an automatic dishwasher starts draining off excess water. Listen for this change in the cycle and see if there’s any correct draining of liquid into your preferred point of discharge.
- Turn off the dishwasher: Once you are through with verifying those three factors (water supply, drainage system, and how it works), switch off your device. Remember that no dishes are placed into this unit when performing this preliminary inspection.
Tip: “For effective dishwasher operation, regular pre-checks are helpful. They can help you identify possible issues at an early stage and keep your machine working well.“
#9. Preparing for Dish Washing

- Scrape off excess food: Remove any leftover food from your dishes before loading. This will help avoid clogging the filter and make cleaning more efficient.
- Pre-rinse if needed: Some dishwashers may indicate that dishes should be rinsed before washing, particularly when they are heavily soiled. Indeed, a little warm water quickly running over them could remove stuck-on food and prevent odor build-up.
- Check dishwasher guidelines: Different brands of dishwashers may recommend different methods of prewashing. To know what’s right in this regard it is always good to consult the user manual.
- Consider dish material: Find out about the material used for your dishes. Some materials shouldn’t be put in the dishwasher. For example, woodenware, irons, bronze, and certain types of plastic must usually be washed by hand.
- Avoid blocking sprayers: Ensure that none of your plates obstruct the spray nozzles when you load the dishwasher. This guarantees that water gets into every surface and cleans everything correctly.
- Load delicate items carefully: When inserting fragile items such as glassware or fine china, ensure they’re well placed to avoid breakage. In most cases, they fit best on the top rack.
Tip: “To wash dishes efficiently develop a norm whereby leftovers are scraped off; where necessary dishes rinsed; and loaded properly as well. Remember that if handled well this can boost performance and prolong the life span of both your dishwasher itself as well as yourself!”
#10. Loading the Dishwasher Efficiently
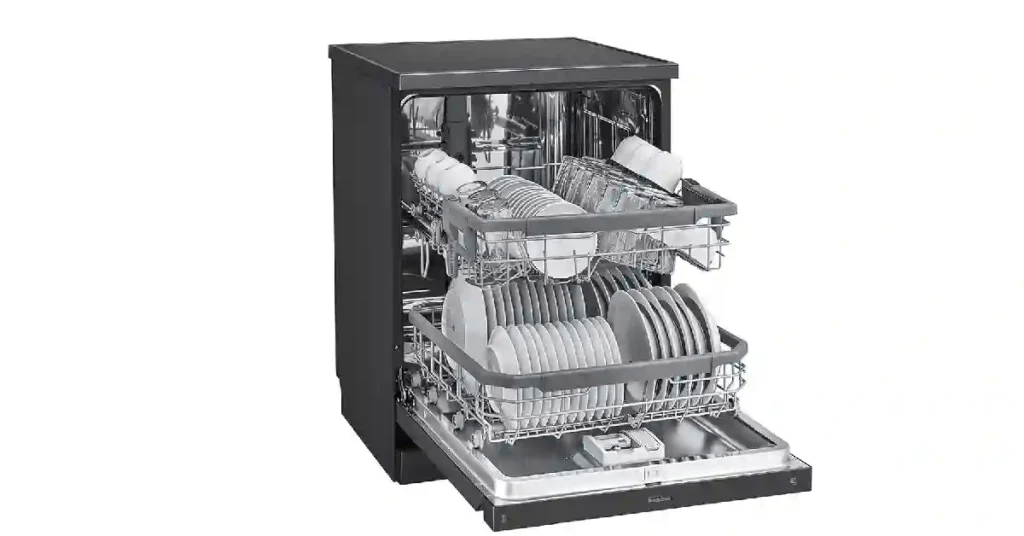
- Arrange plates: To achieve better water reach, the plates should be arranged in the bottom rack with larger plates towards the back and smaller ones near the front.
- Place cutlery: For safety purposes, cutlery should be placed in the cutlery basket, with handles down. To prevent nesting mix forks, knives, and spoons.
- Position glasses and mugs: Avoid water spots by placing glasses, mugs, and cups on the top rack between tines, not over them.
- Set bowls and containers: Better cleaning and drying can be achieved when bowls and containers are angled downwards on the top rack.
- Load large utensils: The large utensils that do not fit into the cutlery basket can be placed on top of it without blocking spray arms.
- Arrange pots and pans: Pots pans and other large items should be facedown to get a direct spray into the bottom rack.
- Avoid overcrowding: Water or detergent cannot reach all surfaces when overcrowding is taking place. There must be space left between dishes for effective cleaning.
Tip: “Dishes must be efficiently loaded to ensure thorough cleaning of every item. It is important to remember that creating enough room for the free flow of water is central to an efficient and effective cleaning process. Overcrowding only leads to incomplete dish washing hence a need for another cycle.”
#11. Adding Detergent and Rinse Aid
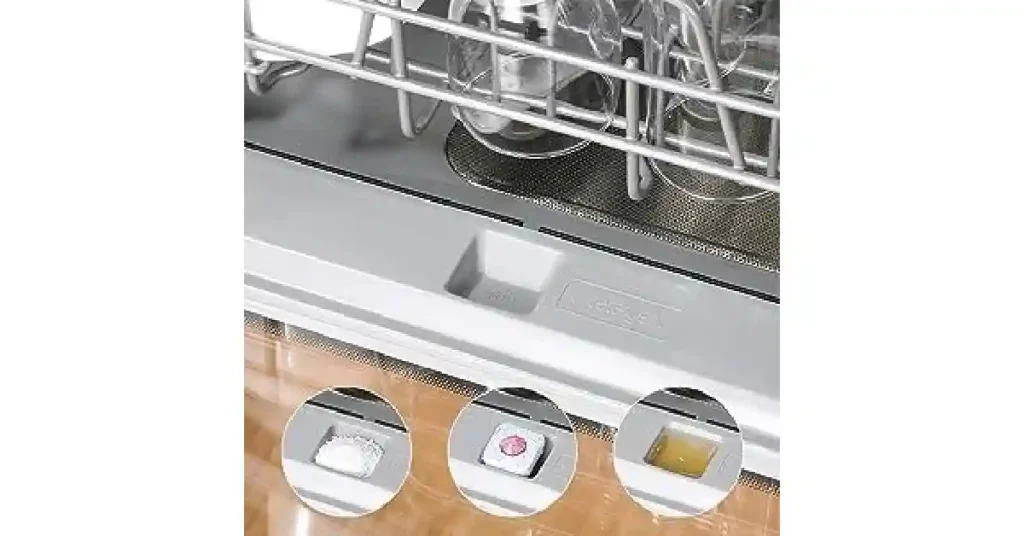
- Types of Detergents: Usually, compact dishwashers are compatible with standard soaps for dishes. These come in various forms – powder, gel, or tab. Each has its advantages but generally, tabs are the most convenient and least messy.
- Detergent Quantity: The amount of detergent needed depends on the hardness of your water supply. In the case of soft water, you will require a lesser amount while more may be necessary if it is hard. A full load of clean utensils can usually be cleaned using one dishwasher tab, or 15gm of detergent powder or gel.
- Detergent Placement: The door inside the dishwasher contains a place where the detergent is kept. Just open it up, put in the soap, and close before starting to wash your dishes.
- Role of Rinse Aid: Rinse aid is essential to your dishwasher’s working mechanism. It decreases water’s surface tension making it spread and drain off better from your dishes hence saving them from watermarks.
- Rinse Aid Benefits: Aside from making sure dishes are free from streaks; rinse aid also results in quicker drying as little water remains on the utensils after completion of a cycle.
- Adding Rinse Aid: Rinse aid is put into another well next to that which holds the washing agent that is very often found near the door side. Fill monthly or when indicated by your machine to be low.
- Rinse Aid Quantity: Unfortunately, most of these dishwashers have a discrepancy in how they are designed to control this. Nevertheless, if it has manual settings, please refer to its user’s manual for specific guidance.
Tip: “Always choose a high-quality detergent and rinse aid for your dishwasher. Although detergent makes sure your dishes are clean, rinse aid ensures that your dishes dry perfectly without spots on them. So check regularly whether there is enough rinse aid to refill it when required!”
#12. Selecting the Right Wash Cycle

- Heavy-Duty Cycle: As you may guess from its name, the heavy-duty cycle is meant for pots, pans, and dishes with stubborn dirt. It employs a longer period with higher temperatures for an intensive cleaning process.
- Normal Cycle: Normal cycle is best suited for everyday dishwashing needs. It can handle moderately dirty utensils thus striking a balance between efficient cleaning and energy consumption.
- Quick Wash Cycle: When you’re in a hurry, go for the quick wash. It’s perfect for lightly soiled dishes and greatly decreases the washing time.
- Glass or Delicate Cycle: When you’re in a hurry, go for the quick wash. It’s perfect for lightly soiled dishes and greatly decreases the washing time.
- Eco-Cycle: This particular cycle is designed to handle fine china and glassware among other fragile items. In order not to damage them it runs on lower water pressure and temperature levels than normal ones do.
- Rinse and Hold Cycle: If you’re not ready to run a full cycle, use this function. It rinses off food residues, preventing odors without using detergent.
- Sanitize Cycle: This particular cycle is designed to handle fine china and glassware among other fragile items. In order not to damage them it runs on lower water pressure and temperature levels than normal ones do.
Tip: “Consider the level of soil and the kind of dishes while selecting a wash cycle. This will clean optimally while saving energy and water. You should remember that by utilizing appropriate cycles, you can make your dishwasher last longer, conserve resources, and have cleaner dishes.”
#13. Starting the Dishwasher

- Check and Double-Check: Ensure your dishwasher is properly loaded with all items placed inside it; add appropriate amounts of detergent and rinse aid then select the correct wash cycle before turning it on.
- Close the Dishwasher Door: When you are done with everything close the dishwasher door. Ensure its locking mechanism is functioning well otherwise the cycle will not begin.
- Start Button: Locate the start button on your dishwasher. It could be a physical button, a touch panel, or a dial, depending on the model. Press or turn it to initiate the cycle.
- Cycle Selection: Find the start button for your dishwasher which could be a physical button, touch panel, or dial depending onthe design. Press or turn to initiate the wash cycle.
- Delay Start Function: After pressing the start button some dishwashers may require you to choose a cycle. If so do it now according to your preference. Set any delay time if applicable using the built-in delay start feature in case you want to use this function in your machine.
- Indicator Lights: Check the indicator lights on your dishwasher. They should show that a cycle is in progress.
- Let It Run: Do not open when a cycle has started as opening causes hot water to escape affecting washing performance.
Tip: “Just in case there are any problems during the cycle, for example, the dishwasher failing to start, failure to drain water, or dishes not getting cleaned properly, you can consult a user’s manual provided with the appliance or seek help from a professional. The most common issues can be avoided by carrying out regular maintenance of your dishwasher thereby lengthening its lifespan.”
Energy saving tips
- Load Efficiently: You may use up less energy if you load your dishwasher properly. Fill up all possible areas and arrange loaders in suitable heaps hence reducing cycles to save energy.
- Use Eco-Cycle: Many dishwashers have an eco-friendly cycle that uses less water and lower temperatures. It is slower but it is good for saving energy.
- Air Dry: If possible, switch off the heat dry and let your dishes air-dry in case your dishwashing machine does have this feature. Despite taking longer to complete its drying task, it saves much energy when compared to using the heat dry mode.
- Run Full Loads: In any event, always run a full load in your dishwasher. Half-loads wastewater and power. Nonetheless, keep away from overloading since it causes ineffective cleaning as well as repeated rinses.
- Maintain Regularly: To keep it running efficiently regularly; maintain the dishwasher by avoiding clogged sprayer arms and filters which hinder efficient water flow thus saving both energy and water consumption.
FAQs
How often should I clean my dishwasher filter?
Make sure that you clean the filter of your dishwasher, at least thirty times a month, this is necessary to ensure its best performance and efficiency in terms of cleaning.
Can I wash plastic items in my dishwasher?
Yes, you can use a dishwasher for washing plastic items but check if they are marked as safe to wash with it. They should always be placed on the top rack to avoid any melting problems caused by the heating element.
What happens if I use regular dish soap instead of dishwasher detergent?
The use of regular dish soap can cause too much foaming and eventual overflows. Always employ dishwashing detergent that is meant specifically for one’s dishwasher.
Why are my dishes not drying properly?
The problem could arise from incorrect drying; overloading, absence of rinse aid, or selecting a cycle without drying components among others. For more specific information consult your user manual or seek advice from an expert.
Conclusion.
To sum up, knowing How to Use a Portable Dishwasher effectively will go a long way in improving its performance and longevity.
Every move ranging from loading it right to choosing an appropriate wash cycle among others such as regular maintenance is significant for clean and disinfected dishes.
Additionally, incorporating energy-saving measures like efficient loading, eco-cycle usage, and air-drying leads to decreased energy consumption.
This knowledge not only improves dishwashing but also encourages a more eco-friendly lifestyle. I have written an article below explaining all that pertains to how to use portable dishwashers.
If you have any inquiries, feel free to contact us. Don’t hesitate to share this informative article with your family and friends.