It is essential to wash your new wet grinder before its first usage, as it may have some dust, foreign materials, or grease from the factory that can spoil your food.
We will help you clean your wet grinder very easily and effectively, as this will not only make the preparation of the food hygienic but also increase the life of your grinder.
This tutorial will target the question: How to Clean Wet Grinder Before First Use? New wet grinders come with factory residue, dirt, and packing too, so all of them need to be cleaned before usage to prevent food from being spoiled.
Following this first-time cleaning routine will help you get the best performance out of your wet grinder right from the start.
Why Cleaning a New Wet Grinder is Important
Dust particles, metal shavings, or even lubricants from the factory can be found in your wet grinder, and these must be removed before use; otherwise, they will impair the taste of the food and the performance of the machine.
A clean grinder can improve the durability of the unit and ensure smooth operations.
What You’ll Need for Cleaning.
- Soft, lint-free cloth
- Mild dishwashing soap or detergent
- Scrub pad (non-abrasive)
- Water
- Dry towel
Get your cleaning tools ready to clean your new grinder.
Step-by-Step Guide on How to Clean Wet Grinder Before First Use.
It’s important to clean your wet grinder before you use it for the first time, as it impacts its durability as well as food safety.
These new machines often contain unwanted factory residues, dust, and oils that need to be cleaned up to help keep the machine running effectively and prevent bad smells or tastes from seeping into your foods.
You may follow this detailed step-by-step guide on how to scrub every inch of your wet grinder before the first usage, and this will ensure the efficiency and durability of the machine.
Step 1: Unbox and Inspect the Wet Grinder.
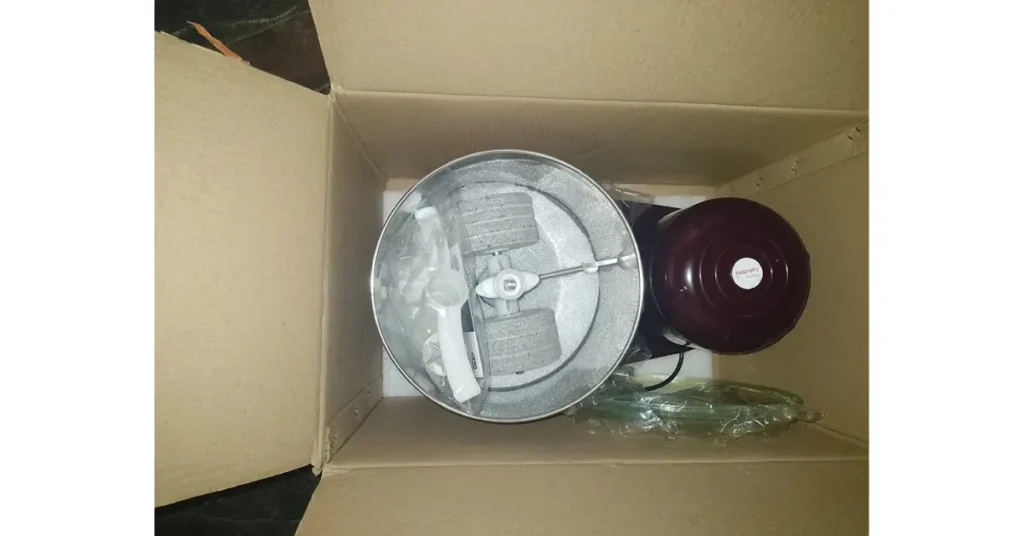
The first thing you need to do is to verify the condition of the wet grinder after removing it from its packaging.
You have to open the packages carefully and examine if the parts have suffered any damage during shipment.
Always check that the accessories, such as the drum and the grinding stones, function properly. This step ensures you won’t encounter unexpected issues later.
Step 2: Disassemble the wet Grinder Parts.
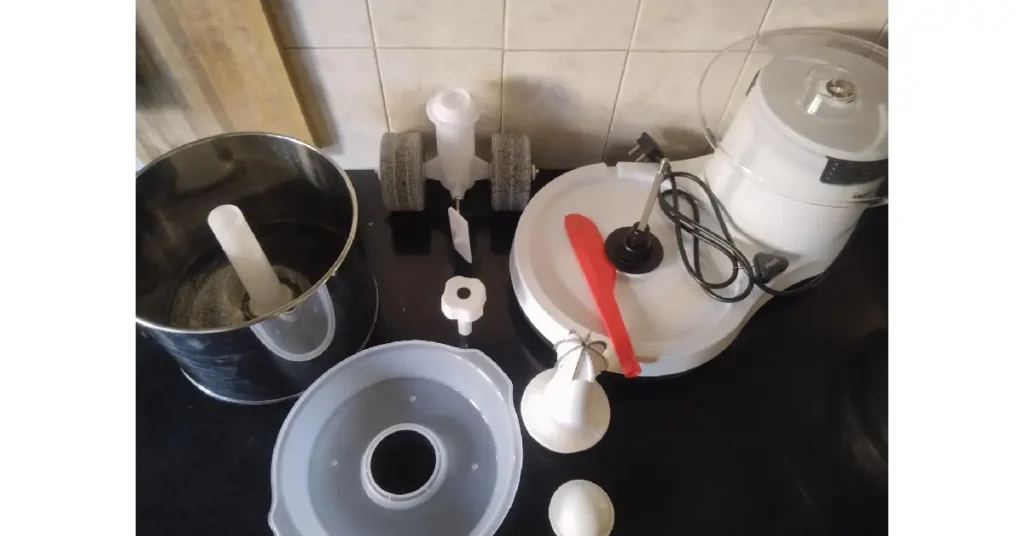
To begin, you must remove the installable elements of the machine, that is, the grinder and all its associated parts.
Generally, in a majority of wet grinders, the parts such as the drum, grinding stone, and lid can be easily removable grinder parts.
If they cannot figure out how to clean new wet grinder before first use can always check the user manual. Detaching all the parts gives you the advantage of cleaning every single part of the machine, which is very important if one wants to wipe out all the industrial residues and oils.
Step 3: Clean the Exterior of the Wet Grinder.
Remove the dust and dirt using a soft, moist cloth while cleaning the outer surface of the grinder which has accumulated during the grinder’s shipment.
To ensure wet grinder hygiene, make sure that no graphic fades or scratches are left on the body of the outer house by applying harsh chemicals to it.
Step 4: Wash the Drum and Grinding Stone Thoroughly.
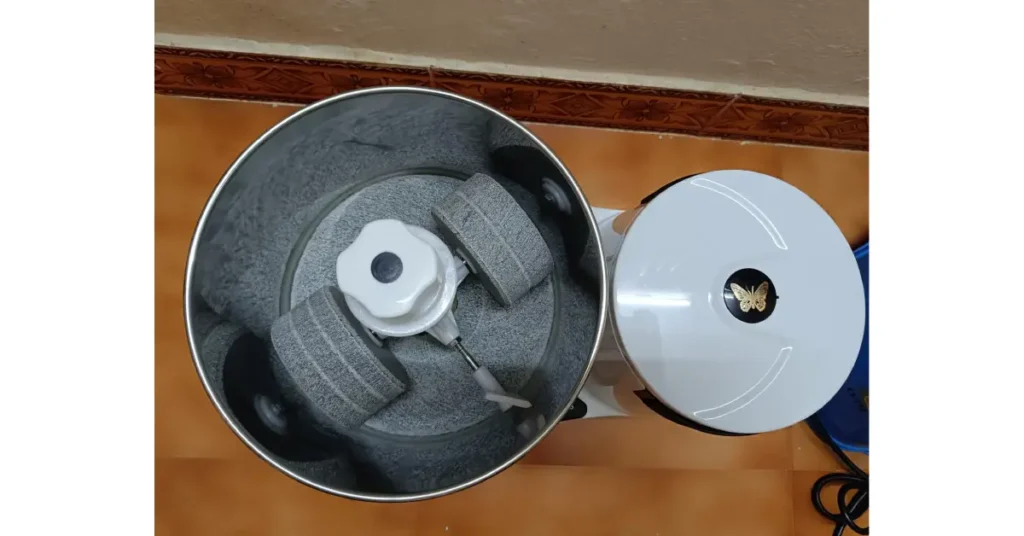
Let us now turn our attention to the most relevant parts: the drum and the grinding stone.
With the use of a non-abrasive sponge or a soft scrub pad that has been slightly dampened with a mild detergent or dishwashing soap, scrub gently the cleaning grinder drum and the stone.
This step will assist in cleaning any machine-made oil, metallic chips, or dust that was not eliminated during the production process. Clean both the inner and outer surfaces of the drum and every area on the washing grinding stone.
While scraping the grinding stone, exercise caution—don’t use harsh chemicals or scouring pads, which could cause scratching on the surface and thus sabotage its grinding efficacy.
Wash the drum and stone well under tap flow until all the soap is removed from the surfaces.
Step 5: Clean the Lid and Other Accessories.
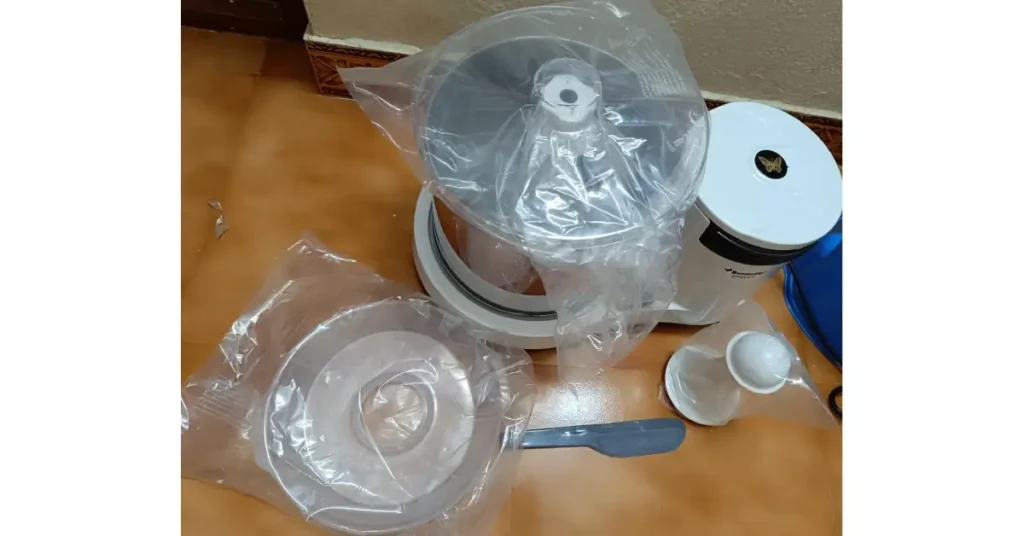
If accessories come with a wet grinder, such as a lid spatula or wiper, and if they are connected and removable, let them soak in warm water with mild soap first before washing them.
Some of these parts may have been exposed to dust or mud during the processes of production or packing. The cleaning of such parts will also prevent possible contamination of the food when these components are in the safe wet grinder first use.
Step 6: Rinse All Parts with Clean Water.
After sanitizing the drum, stone, and accessories, it’s time to wash them off in running, clean water.
Make sure there is no soap or detergent on the surface of any part of the grinder, as it can be harmful when dissolved in food.
This is one of the important operations that will help get rid of all the dirt that may have been left inside the machine during manufacturing and cleaning.
Step 7: Dry the Grinder Parts Completely.
When rinsing, the remaining parts of the grinder should be dried thoroughly with a towel or a cloth, paying special attention to the drum and the grinding stone.
It is necessary to wipe everything dry as moisture left behind will promote the development of mold spores or rusting of metal parts over time.
If possible, allow the parts to dry in the air for some time before putting the grinder back together, preventing rust.
Step 8: Reassemble the Wet Grinder.
After all the affected parts have been dried out completely, the wet grinder may now be assembled with care.
The grinding stone must be fitted into the drum, and all other parts must be assembled as directed by the manufacturer.
Before proceeding to the next step, confirm that there are no loose items.
Step 9: Perform a Test Run.
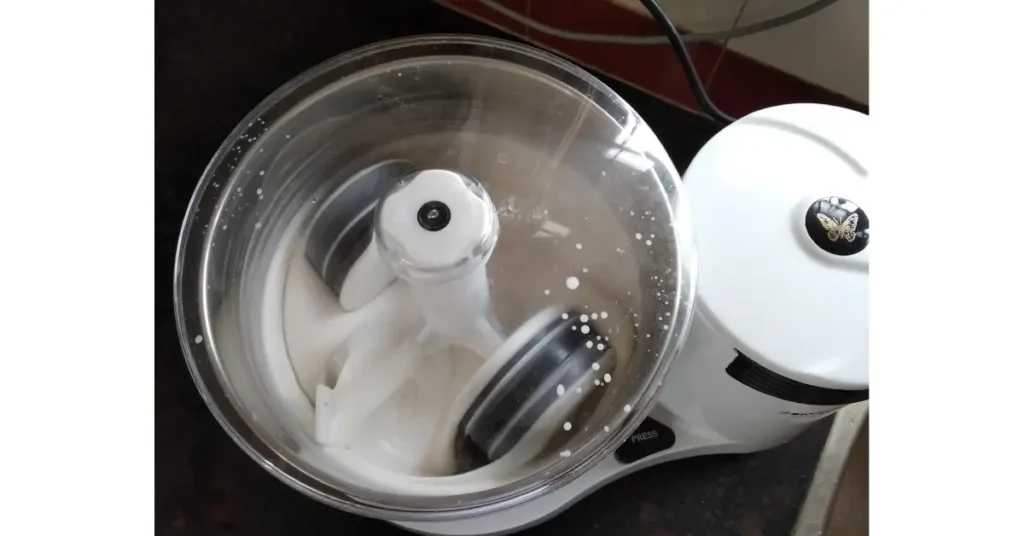
It is advisable to only use the grinder once a test has already been conducted.
Lower the water level of the drum and start the machine to operate for a few minutes.
It will help in removing any dust particles or debris that could remain inside. After this, the end of the testing process has come, and one can wash away dirt once again off the drum.
Your wet grinder has now been cleansed and is ready for its first use.
Additional Tips:
- Try not to use strong chemicals for cleaning.
- Always dry the drum and stone thoroughly after each cleaning session.
- Regular maintenance of the grinder is essential to keep it performing at its best.
how to use wet grinder for first time
If you’ve just bought your first wet grinder (like a Premier, Butterfly, or Ultra), this guide will walk you through how to use grinder for first time, wash it properly, and avoid common mistakes. Let’s get started!
#1. Unboxing and Initial Inspection
- Components verification: Toggle off the switch. Check for grinding stones, drums, lids, and spatula.
- Look for damages: Are there scratches or cracks in the stone? Call the brand in case.
- Voltage verification: Check voltage; note that most Indian wet grinders run on 220- 240V. Ensure the same.
#2. Should You Wash a Grinder Before Using It?
Yes! Grinders attract dust, grease, or other residues from the manufacturing process. How to wash a grinder:
Detaching the stone and drum: Wash them separately.
Mild detergent: Choose mild ones; never heavy-duty chemicals. Clean using a soft sponge.
Rinse thoroughly: Ensure no soap residue remains.
Dry completely: Wipe with a clean cloth so as not to rust.
Pro tip: Don’t ever immerse the motor or any electric part in water!
#3. Assembling Your Wet Grinder
- Attach cooking stone: Secure it to the base.
- Place the drum: Align it under the stone.
- Add water: Fill up to one-third of the way into the drum to keep the stone lubricated for the grind.
#4. How to Use a Wet Grinder for the First Time
Step 1: Prepare ingredients
- Soak rice and dals for a period of four to six hours. Drain before grinding.
Step 2: Place Ingredients in the Machine
- Fill ingredients to the drum; for idli batter, this would have a ratio of urad dal to rice as 1:4 ratio.
Step 3: Start Grinding
- Turn on the machine; let it run for 20-30 minutes to form a paste.
- Add water gradually, 1-2 tbsp at a time, till the required consistency.
Step 4: Stop and Scrape
- Come to a halt now, using the spatula, as is appropriate, to scrape down the batter sticking to the sides.
- Never use metal utensils, as they may cause damage to the stone.
#5. Cleaning After Use
How to wash a grinder post-use:
- Unplug the grinder.
- Remove the leftover batter using the spatula.
- Rinse the drum and stone with warm water with a little brush.
- Ensure they are completely dry; moisture will attract mold in India’s humid climate.
Tips for Maintaining Your Wet Grinder.
Below are some detailed tips to help you maintain your wet grinder in optimal condition.
#1. Clean the Wet Grinder After Every Use.
Once you are done using the drum and the grinding stone, wash them thoroughly with water to eliminate any food debris, which can serve as a breeding ground for bacteria.
This type of cleaning increases wet grinder hygiene and extends the lifespan of the grinder.
#2. Dry All Parts Properly.
Make sure moisture is eliminated from all the parts before the grinder is reassembled to prevent rust and mold growth.
Moisture is indeed the worst enemy to a grinder since it can cause massive damage.
#3. Use the Grinder Correctly.
To avoid overuse or excessive heat of the grinder, follow the guidelines set by the manufacturer.
If the grinder is used appropriately, its motor will experience less wear and tear, which translates to smoother operations.
#4. Store the Grinder in a Dry Place.
Do not leave the grinder in or near moist areas to avoid moisture, which can easily damage the motor and lead to rusting.
Further, do not place the grinder in highly humid areas.
#5. Lubricate the Moving Parts Regularly.
Make sure the grinding stone and other movable parts are lubricated from time to time to avoid too much friction and allow for smooth movement.
This will also go a long way in reducing wear and tear over time.
#6. Avoid Using Harsh Cleaning Agents.
Pour a mild detergent into the sink and use soft scrubbers to clean the grinder.
Do not use harsh scrubbers or chemicals as these can erode the drum and the grinding stone.
#7. Replace Worn-Out Parts Promptly.
Look for any nicks or scrapes on the ground stone and drum and replace them as soon as possible if there are any signs of damage on them.
It is advisable to replace them in due time to maintain grinding efficacy and avoid damage.
Common Mistakes to Avoid When Cleaning a Wet Grinder.
Here are some common mistakes people make when cleaning a wet grinder:
#1. Submerging the Motor in Water:
The immersion of the motor in water should be avoided at all costs as it could result in a short circuit and irreversible damage.
Only use a dry cloth while cleaning the motor area.
#2. Using Abrasive Cleaners or Scrubbers:
Do not use materials such as steel wool in the cleaning of the drum and stone because they may leave scratches that would interfere with the efficiency of the grinder over a period of time.
#3. Forgetting to Dry the Parts Properly:
The incomplete stuffing of the stone and drum used in the cylindrical grinder unit may cause mold infestation or rust encumbrance. Care should be taken that all components are dry after washing.
#4. Skipping the Initial Cleaning Before First Use:
Since grinders are subjected to the screening process, it is recommended not to omit the first cleaning otherwise, food infection would incur. The use of grinders should be preceded by cleaning.
#5. Not Rinsing Off Detergent Thoroughly:
Detergent that remains on the item has the probability of combining with the food and causing contamination. It is essential to thoroughly rinse all areas with warm water to eliminate the presence of soap.
#6. Ignoring the Drum and Grinding Stone Regularly:
Routine scratching of the drum and grinding stone after one use can lead to the accumulation of food; hence, one’s grinder will be inefficient. Scrubbing out is a great way to improve their sanitary conditions.
#7. Overusing Harsh Chemicals:
It is quite evident that hard chemical substances will impact the grinder parts adversely. The use of mild detergents to clean the grinder will be suggested under such circumstances.
FAQs.
Should you clean the grinder before first use?
Yes, we recommend cleaning your grinder before its first use. Any new grinder you buy may have some dust or debris or even some oil from the manufacturing process that you would not ideally want to add to your ingredients. Nonetheless, a quick cleaning should help you achieve optimal performance and flavor right from the start.
How to wash a new grinder?
To clean a new grinder:
1. If it is possible, disassemble the grinder.
2. Use a wet cloth to wipe downF all parts or soak the parts and wash them in warm soapy water (only if recommended for the material of your grinder).
3. Rinse off thoroughly for any soapy remnants.
4. Allow all components to air dry completely before reassembling and using it again.
How to start using a new grinder?
Before you start using a new grinder:
1. In the same manner mentioned above, clean the grinder.
2. Assemble all the parts and tighten them in place.
3. Before operation, run the grinder with nothing in it to make sure it’s working smoothly.
4. Now, you are able to put the ingredients in the grinder and start grinding it for yourself.
How do you clean a new hand grinder?
To clean a new hand grinder:
1. Firstly, unscrew the top and take off the handle and the burrs. This will disassemble the grinder.
2. Dust or leftover debris can be removed with a dry brush or a dry cloth.
3. Part of the heads may be washable so use warm water with soap, rinse, and dry well.
4. You can put the grinder again together and it is ready to be used.
How to clean a grinder that got wet?
If your grinder gets wet, you might also wonder how to clean a new wet grinder to ensure it stays in perfect condition., follow these steps:
1. Always disassemble it right after use. Moisture will cause the greatest degree of damage.
2. Using a dry towel, wipe all parts to remove excess water present on every part of the grinder.
3. If necessary, utilize a hair dryer on low heat to assist in drying inaccessible areas.
4. All components should be left out and allowed to air dry thoroughly before reassembling them. Also, do not use it until all parts are completely dry.
Conclusion.
The careful washing of your wet grinder before its first use ensures safety in food preparation and productivity.
Simple steps can be executed for how to clean wet grinder before first use, which would help in the effective removal of factory residues, thus facilitating users to prepare their pans for food depending on instructions for the remaining.
Do not neglect the habit of regularly cleaning the device and patting it dry in order to prolong its main feature.
I am confident that these health guidelines will help you get the maximum possible out of your new wet grinder every time you operate it.
You Can also read this article.
